Infusion Resource Center
Whether you’re looking for quick help with a specific issue or a full training program to get your team started, you will find our support and learning resources helpful, flexible, and convenient.
CURLIN 6000
CURLIN 6000 training videos, downloads, FAQs, troubleshooting, and more. More »

CURLIN PainSmart
CURLIN PainSmart training videos, downloads, FAQs, troubleshooting, and more. More »
Articles & Insights
Stay up-to-date on the
latest news & insights. More »
CURLIN 6000 Training Videos
For an optimal viewing experience, we recommend using one of the following web browsers: Google Chrome, Microsoft Edge, Apple Safari, or Mozilla Firefox


Troubleshooting & Alarms
CURLIN 6000 Troubleshooting & Alarms
For a full list of alarms and troubleshooting guidance, please see the CURLIN 6000 User Manual.
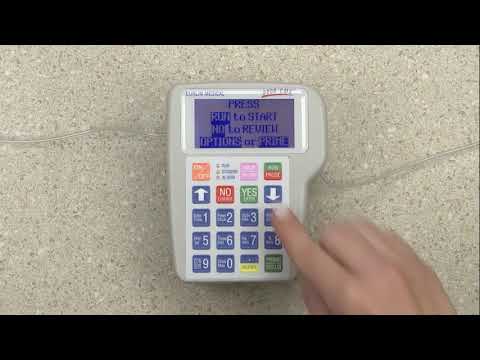
For all alarms except “INFUSION COMPLETE”, follow these instructions before proceeding to the RESOLUTION section below:
- To silence and exit Alarm/Alert screens, press the PAUSE key
- Press YES to RESUME, then resolve the alarm
- When ready to resume the infusion, press RUN to start the infusion.
Alarms, possible causes, and steps for resolution
- INFUSION COMPLETE
Press PAUSE, attach new solution container, highlight REPEAT RX and press YES. The program will auto-scroll (or confirm each field by pressing YES). If therapy is complete, turn pump off. - AIR-IN-LINE
Press the PRIME key, then follow on-screen instructions to remove air from the tubing and IV bag. CAUTION: Disconnect set from patient’s access site before priming. Sets with in-line ASVs must be primed on the pump. - DOWN OCCLUSION
Down occlusions auto-correct when occlusion is resolved without the need to press PAUSE. Check the tubing from pump to patient’s IV site for cause, then correct obstruction per protocol. Consider changing the DN Occlu setting from LOW to HIGH (See OPTIONS section). Possible causes: kinked or clamped line, infiltrated/ positional IV site, viscous solution, small gauge catheter. - UP OCCLUSION
Check tubing from pump to IV bag for cause, then correct obstruction per protocol. Possible causes: glass container without vented spike adapter, line kinked in pump door, bag empty, bag not spiked properly. - HIGH UP PRESSURE
Check for excessive pressure on IV bag. Causes: uneven fluid distribution within lockbox or carrying pouch, object pressing on solution container. - SET NOT INSTALLED
Use only Curlin administration sets. Check that set is installed properly. Refer to Instructions for Use in set package or Installing Administration Set section in this guide. Possible causes: tab not removed from yellow Flow-Stop, blue guide pin or yellow flow-stop not properly seated in receptacles, no set installed. - UNATTENDED
The pump will alarm when left idle for 2 minutes. Press RUN to start the infusion or press OFF to power down the pump. - REPLACE SET 3
Replace set and prime if necessary. Possible causes: flattening of the soft pumping segment of the set due to overuse, use of a glass container without a vented spike adapter, excessive plunger stiction with syringe use. - REPLACE SET 4
Equalize the pressure in the set by priming (disconnect from the patient). Turn pump OFF then ON to reset the sensor prior to resuming the infusion. - DOOR OPEN
Check placement of the administration set and close pump door properly. See User’s Manual for instructions. - EMPTY BATTERY
Turn pump off by pressing the OFF key. Install 2 new batteries and turn pump back on. - ERROR CODE
If an error code occurs, turn pump off and consult provider or manufacturer.
Available Downloads
Find a selection of pdf downloads for the CURLIN 6000 pump.
CURLIN 6000:User Manuals, Guides, & Information
User Manual & Clinician Guides
Supporting Documents and Information
Infusion Infographics
Click on any of the images below to view the full-size infographic.
CURLIN PainSmart Training Videos
For an optimal viewing experience, we recommend using one of the following web browsers: Google Chrome, Microsoft Edge, Apple Safari, or Mozilla Firefox


Troubleshooting & Alarms
CURLIN PainSmart Troubleshooting & Alarms
For a full list of alarms and troubleshooting guidance, please see the CURLIN PainSmart User Manual.
For all alarms except “INFUSION COMPLETE”, follow these instructions before proceeding to the RESOLUTION section below:
- To silence and exit Alarm/Alert screens, press the PAUSE key
- Press YES to RESUME, then resolve the alarm
- When ready to resume the infusion, press RUN to start the infusion.
Alarms, possible causes, and steps for resolution
- INFUSION COMPLETE
Press PAUSE, attach new solution container, highlight REPEAT RX and press YES. The program will auto-scroll (or confirm each field by pressing YES). If therapy is complete, turn pump off. - AIR-IN-LINE
Press the PRIME key, then follow on-screen instructions to remove air from the tubing and IV bag. CAUTION: Disconnect set from patient’s access site before priming. Sets with in-line ASVs must be primed on the pump. - DOWN OCCLUSION
Down occlusions auto-correct when occlusion is resolved without the need to press PAUSE. Check the tubing from pump to patient’s IV site for cause, then correct obstruction per protocol. Consider changing the DN Occlu setting from LOW to HIGH (See OPTIONS section). Possible causes: kinked or clamped line, infiltrated/ positional IV site, viscous solution, small gauge catheter. - UP OCCLUSION
Check tubing from pump to IV bag for cause, then correct obstruction per protocol. Possible causes: glass container without vented spike adapter, line kinked in pump door, bag empty, bag not spiked properly. - HIGH UP PRESSURE
Check for excessive pressure on IV bag. Causes: uneven fluid distribution within lockbox or carrying pouch, object pressing on solution container. - SET NOT INSTALLED
Use only Curlin administration sets. Check that set is installed properly. Refer to Instructions for Use in set package or Installing Administration Set section in this guide. Possible causes: tab not removed from yellow Flow-Stop, blue guide pin or yellow flow-stop not properly seated in receptacles, no set installed. - UNATTENDED
The pump will alarm when left idle for 2 minutes. Press RUN to start the infusion or press OFF to power down the pump. - REPLACE SET 3
Replace set and prime if necessary. Possible causes: flattening of the soft pumping segment of the set due to overuse, use of a glass container without a vented spike adapter, excessive plunger stiction with syringe use. - REPLACE SET 4
Equalize the pressure in the set by priming (disconnect from the patient). Turn pump OFF then ON to reset the sensor prior to resuming the infusion. - DOOR OPEN
Check placement of the administration set and close pump door properly. See User’s Manual for instructions. - EMPTY BATTERY
Turn pump off by pressing the OFF key. Install 2 new batteries and turn pump back on. - ERROR CODE
If an error code occurs, turn pump off and consult provider or manufacturer.
Available Downloads
Find a selection of pdf downloads for the CURLIN PainSmart pump.
CURLIN PainSmart User Manuals, Guides, & Information
Infusion Infographics
Click on any of the images below to view the full-size infographic.
Training Options

e-Learning
Enroll in our comprehensive online training program and learn from any device or location at your own pace. A certificate of achievement is awarded to each trainee upon successful completion.

On-Site education
In-person training at your location is ideal for larger groups requiring several training classes. Our Clinical Specialist will work with your administrator to organize this hands-on training series.

Live-stream video
Connect your team with our Clinical Specialist via live-stream video. We customize this ideal small-group training to meet the needs of your healthcare organization.
Stay up-to-date on the latest news & insights


Get our latest news, tips, and updates delivered to your inbox.
Sign up to receive our newsletter that will help keep you posted on the latest information in the industry, gain insight and understanding of how to better use Moog Medical products, and to get answers to many commonly asked questions; all delivered right to your inbox.
Industry-leading clinical and customer support options right at your fingertips.
From 24 hour per day clinical support, to live stream training, self-paced e-Learning, and onsite education in your facility; our clinical and customer support teams offer the most comprehensive technical training and support in the industry. Call us at 1.800.970.2337 or click the button below for assistance. You can also find online support with our training videos, troubleshooting, FAQs, and download library.